
Eating the (w)hole pi(e) with Pi-hole
Published April 19, 2019
I recently added a Pi-hole to the local network of my apartment (shared with another roommate, potentially relevant later).
The tl;dr of the Pi-hole project is it’s a software stack that sets up a DNS server (along with nice dashboard full of pretty charts) that rejects domains that are blacklisted due to serving ads, tracking user data, etc. In general, you set it up on a device (Raspberry Pi is common due to being inexpensive) on your local network and either configure your router or specific devices to use it.
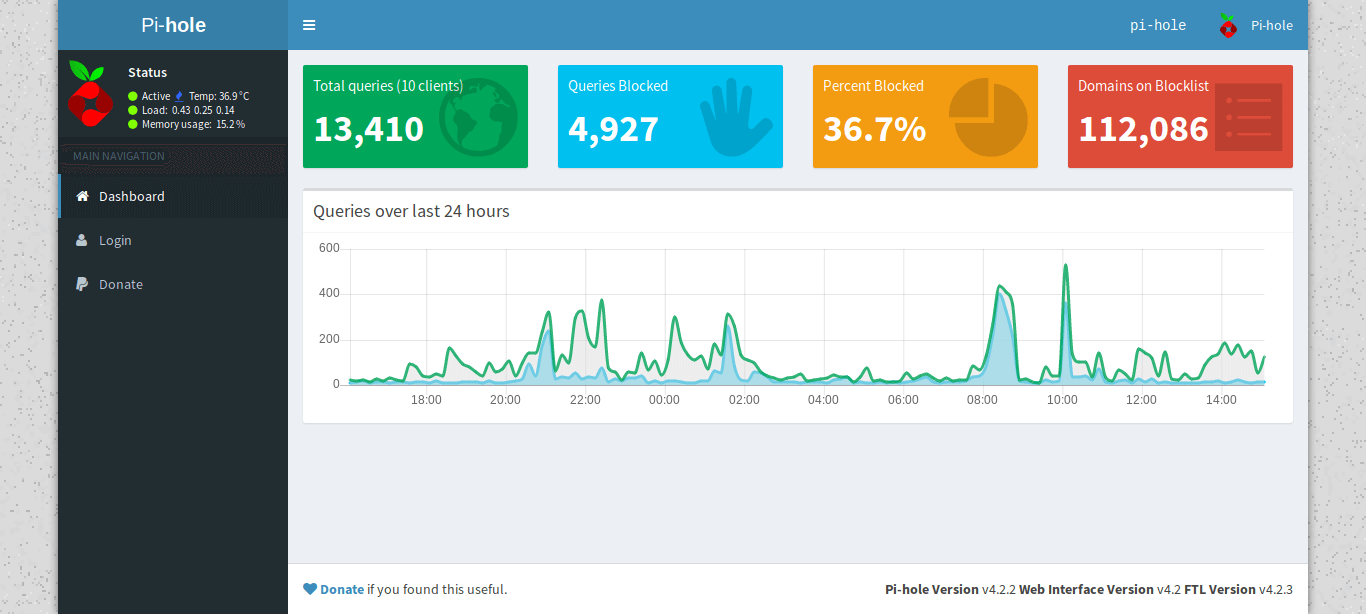 The dashboard of my Pi-hole install
Since it’s blocking at the DNS level, you get benefit of generally improved performance along with preventing ads in contexts that are more difficult to block (e.g. mobile apps). You can choose to use whatever upstream DNS provider you want — my choice these days is Cloudflare (1.1.1.1 & 1.0.0.1).
I used a Raspberry Pi Zero W primarily because I had one laying around and it’s a good fit for this project. While I ended up using the wired Ethernet (eth0) interface, you can get up & running for $20-25 USD with a RPi Zero W, micro SD card, and power supply for the RPi.
Wireless (wlan0)
This isn’t a step-by-step guide with detailed granularity, but more of an overview of the rough steps I took.
Flashed the micro SD card with Raspbian Lite using Etcher.
Set up the RPi headless referencing this article: https://desertbot.io/blog/setup-pi-zero-w-headless-wifi
- Changing the hostname is very much worthwhile.
Installed Pi-hole: https://nick.blog/2017/01/09/how-to-install-pi-hole-on-a-raspberry-pi-zero/
- Changing the password is an excellent idea.
Got the MAC address with
ifconfig(also this: https://raspberrypi.stackexchange.com/questions/71824/how-can-i-find-the-mac-address-of-my-wi-fi-interface).Gave the device a static IP in the router using the MAC address from above.
Pointed the DHCP DNS server to the static IP set.
- Good information on using devices and/or routers with the Pi-hole: https://discourse.pi-hole.net/t/how-do-i-configure-my-devices-to-use-pi-hole-as-their-dns-server/245
Hard-wired (eth0)
After this, it was all working on wlan0 but switching to a hard-wired connection on eth0 seemed like a good call:
Disabled
wlan0(& Bluetooth): http://blog.mmone.de/2017/05/16/raspberry-pi-zero-w-disable-bluetooth/Re-ran
pihole -rwith the “Reconfigure” option.Updated the MAC address for the static IP in the router config.
Finally, the Pi-hole was set up on the local network with a wired connection. Like the first time around, I gave the MAC address a static IP (went with 192.168.1.2 since the router is 192.168.1.1). It’s pretty easy to see if it’s working on a device by going to pi.hole in a browser. FWIW I did need to disable Private DNS on my Android phone (was using Cloudflare previously).
Automation with cron
I decided to add some automation for keeping the Pi-hole up to date along with adding some protection against network outages.
The command to update the Pi-hole is pihole -up. I found an article outlining a script on how to reboot a RPi on a network outage: https://weworkweplay.com/play/rebooting-the-raspberry-pi-when-it-loses-wireless-connection-wifi/
I modified the script:
#!/usr/bin/env bash

ADDR="192.168.1.1"

echo $(TZ=":US/Eastern" date)
printf "Pinging $ADDR... "
ping -c 4 $ADDR > /dev/null

if [ $? != 0 ]; then
        printf "NOT OK. Rebooting.\n"
        sudo /sbin/shutdown -r now
fi

printf "OK.\n"
Set up the crontab (sudo crontab -e):
# Every five minutes: ping router (192.168.1.1) -- reboot if nothing
*/5 * * * * /usr/local/bin/checkwifi.sh >> /var/log/checkwifi.log 2>&1

# Every day at 5am: Check `pihole` for updates
0 5 * * * /usr/local/bin/pihole -up >> /var/log/piholeup.log 2>&1
I haven’t set up anything to keep the RPi itself update to date. Figure occasionally SSHing in and running
sudo apt-get update -y && sudo apt-get dist-upgrade -y && sudo apt-get autoremove -yisn’t terribad.
That’s all, folks. If you’ve been on the fence about trying out the Pi-hole for yourself, I’d thoroughly recommend it. The payoff for a couple of hours is excellent with noticeable performance gains. I’ll leave you with a screenshot of the full Pi-hole dashboard.
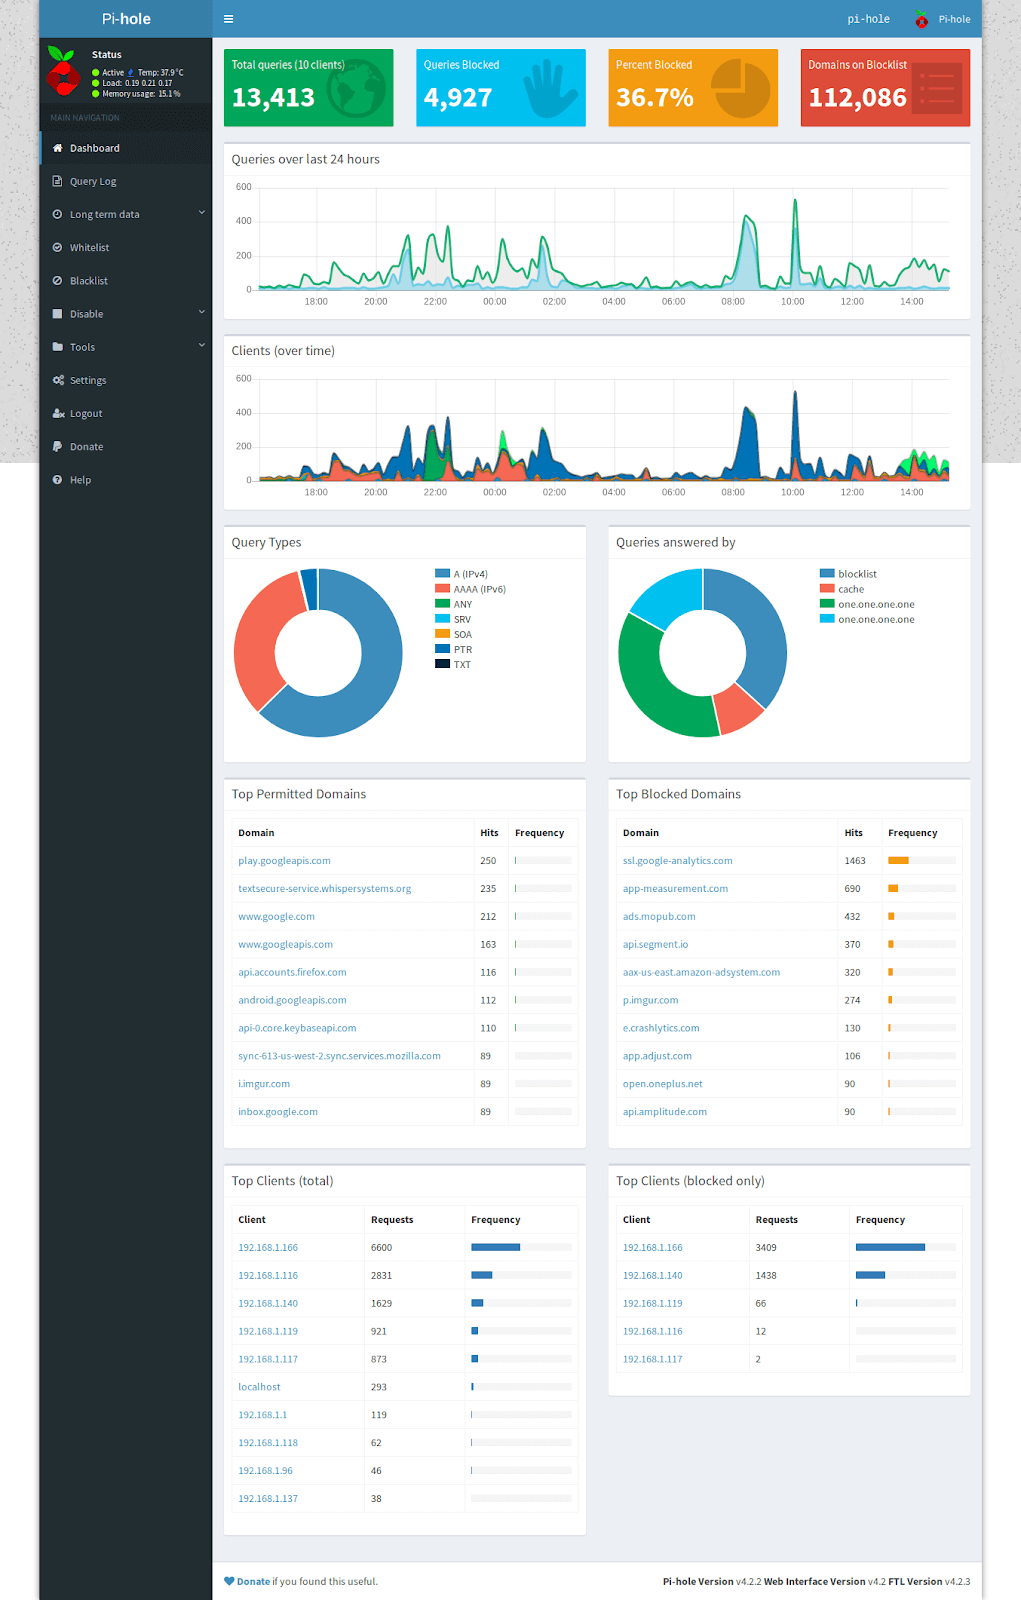 Data is beautiful
Last modified April 19, 2019 #dns #privacy #security